Hi, this is Alice Home


  • 首页

  • 分类

  • 关于

  • 归档

  • 标签

  • 公益404

Learning SQLite for iOS

发表于 2016-12-01 | 分类于 iOS

[TOC]

Chapter 1:介绍 SQL 和 SQLite 这一章节,介绍 SQL(structured query Language) 北京和移动数据库 —— SQLite.

About SQL

Where does SQLite stand in today‘s industry ?

iOS with SQLite

Embedded database

The architecture of the SQLite database

Features

The advantages of using SQLite

SQLite 数据的优点:

  • SQLite 有数据限制特性以及编辑或者删除表不需要加载到内存中
  • SQLite 的数据存储在硬盘上,速度比 Core Data 慢一些
  • Core Data 没有数据限制,需要通过 app 的业务逻辑来限制数据量
  • Working with SQLite

    SQLite 官网:www.sqlite.org,在这个官网上可以下载数据库二进制源码,可以查看文档和源代码。在这里,提供了 SQLite 的共享库以及 DLL,当然还有 CLP(command-line-program),还支持 TCL 扩展,可以通过它进行数据库的链接和更新。

    The examples of using SQLite with iOS

Chapter 2:数据库设计概念

Chapter 3:管理数据库

Chapter 4:Essentials of SQL

Chapter 5:Exposing C API

C API 的调用,通过这些 API我们可以很方便的在应用程序中访问数据库。大约有 200 多个 API 供调用。
Chapter 6:Swift with SQLite

Chapter 7:

Chapter 8:

Copy (一)

发表于 2016-07-24 | 分类于 Copy

在 iOS 开发中经常会用到 copy 关键字,主要的应用方面就是 @property 属性的修饰。这篇文章主要关心:

数组(NSArray、NSMutableArray)与 copy

NSMutableArray 作为属性该使用 strong 还是 copy 修饰?

1
2
3
4
5
6

@interface Person : NSObject

@property (nonatomic, copy) NSMutableArray *catNames;

@end

比如,这里有个 Person 类,有一个属性是 catNames,用于存放猫的名字, 我们使用:

1
2
3
Person *p = [Person new];
p.cats = [NSMutableArray arrayWithCapacity:10];
[p.cats addObject:@"Tom"];

这段程序运行的结果是:

1
2018-07-24 12:51:11.928550+0800 CopyDemo[5781:3493921] *** Terminating app due to uncaught exception 'NSInvalidArgumentException', reason: '-[__NSArray0 addObject:]: unrecognized selector sent to instance 0x60400000cdc0'

crash 了!!!

为什么会 Crash 呢?
首先,crash 的语言是找不到方法(unrecognized selector sent to instance)。
其次,我们通过 @property (nonatomic, copy) NSMutableArray *catNames; 做了什么,是让系统自动为我们生成了 setter 和 getter 方法,而 copy 就控制着这些方法的生成细节。如果不修改这段声明的话,可以在 Person 的实现中修改 setter 方法的实现:

1
2
3
- (void)setCats:(NSMutableArray *)cats {
_cats = [cats mutableCopy];
}

或者

1
2
3
- (void)setCats:(NSMutableArray *)cats {
_cats = cats;
}

本质就是:一个 NSMutableArray 的对象,经过 copy 方法生成对象其实是一个 NSArray 对象,也就是上面 p.cats = [NSMutableArray arrayWithCapacity:10]; 赋值运算符左侧其实是一个不可变数组了,而右侧是可变数组。

综上,针对于可变数组,我们使用 strong 来进行修饰,不用 copy。

NSArray 作为属性该使用 strong 还是 copy 修饰?

上面已经说明了,针对 NSMutableArray 我们使用 strong 来进行修饰,那么 NSArray 呢?

首先,我们来看一下,使用 strong 来修饰,会怎样?

1
2
3
4
5
6

@interface Person : NSObject

@property (nonatomic, strong) NSArray *phones;

@end

为 Person 类添加了属性 phones,标识当前人对象拥有的手机,从 API 的定义可以看出,是不可变数组,所以当我们为这个人对象设置了 phones 属性之后,我们不希望手机数量会发生变化,接下来看是具体使用:

1
2
3
4
5
6
7
8
- (void)addPhones {

Person *p = [Person new];
NSMutableArray *phones = [NSMutableArray arrayWithObjects:@"iPhone 5s",@"iPhone 6", nil];
p.phones = phones;// 多态 p.phones = @[@"iPhone 5s",@"iPhone 6"];
[phones addObject:@"iPhone 6s"];
NSLog(@"%@",p.phones);//("iPhone 5s","iPhone 6","iPhone 6s")
}

从上面可以看出,如果我们通过 strong 来进行修饰的话,就不能空着 NSArray 的不可变性了,所以对于 NSArray 我们使用 copy 来修饰会更好一些,这样可以保证类属性的封装性。

Python Tour

发表于 2016-03-03 | 分类于 Python

Mac OS 与 Python

Mac OS 自带了 Python 环境:

1
2
3
4
5
6
7
$ which python
/usr/bin/python
$ /usr/bin/python; exit
Python 2.7.10 (default, Oct 6 2017, 22:29:07)
[GCC 4.2.1 Compatible Apple LLVM 9.0.0 (clang-900.0.31)] on darwin
Type "help", "copyright", "credits" or "license" for more information.
>>>

Pip

Python 的使用离不开 pip,如果当前的 Python 2 >= 2.7.9 或者 Python 3 >= 3.4 那么实际上已经安装了 pip 了。
pip 安装的方式有三种

  • 根据官网中的 install 模块进行安装,这种安装需要一些依赖模块
1
2
3
4
5
6
7
8
9
10
11
12
13
python get-pip.py

Collecting pip
Downloading https://files.pythonhosted.org/packages/0f/74/ecd13431bcc456ed390b44c8a6e917c1820365cbebcb6a8974d1cd045ab4/pip-10.0.1-py2.py3-none-any.whl (1.3MB)
100% |████████████████████████████████| 1.3MB 272kB/s
Collecting wheel
Downloading https://files.pythonhosted.org/packages/81/30/e935244ca6165187ae8be876b6316ae201b71485538ffac1d718843025a9/wheel-0.31.1-py2.py3-none-any.whl (41kB)
100% |████████████████████████████████| 51kB 73kB/s
matplotlib 1.3.1 requires nose, which is not installed.
matplotlib 1.3.1 requires tornado, which is not installed.
Installing collected packages: pip, wheel
Could not install packages due to an EnvironmentError: [Errno 13] Permission denied: '/Library/Python/2.7/site-packages/pip-10.0.1.dist-info'
Consider using the `--user` option or check the permissions.
  • brew install pip 也是可以安装的,但是这种安装需要通过 brew install python 进行,这将会导致你的电脑上有两个版本的 python
1
2
3
4
5
Error: No available formula with the name "pip"
Homebrew provides pip via: `brew install python`. However you will then
have two Pythons installed on your Mac, so alternatively you can install
pip via the instructions at:
https://pip.readthedocs.io/en/stable/installing/
  • sudo easy_install pip

因为前两种方式都需要一些额外的东西,所以我选择了第三种安装方式:

1
2
3
4
5
6
7
8
9
10
11
12
13
14
15
16
17
18
19
20
21
22
23
24
25
26
27
28
29
30
31
32
33
34
35
36
37
38
39
40
41
42
$ sudo easy_install pip
Password:
Searching for pip
Reading https://pypi.python.org/simple/pip/
Best match: pip 10.0.1
Downloading https://files.pythonhosted.org/packages/ae/e8/2340d46ecadb1692a1e455f13f75e596d4eab3d11a57446f08259dee8f02/pip-10.0.1.tar.gz#sha256=f2bd08e0cd1b06e10218feaf6fef299f473ba706582eb3bd9d52203fdbd7ee68
Processing pip-10.0.1.tar.gz
Writing /tmp/easy_install-wo7aGC/pip-10.0.1/setup.cfg
Running pip-10.0.1/setup.py -q bdist_egg --dist-dir /tmp/easy_install-wo7aGC/pip-10.0.1/egg-dist-tmp-ny5uXk
/System/Library/Frameworks/Python.framework/Versions/2.7/lib/python2.7/distutils/dist.py:267: UserWarning: Unknown distribution option: 'python_requires'
warnings.warn(msg)
warning: no previously-included files found matching '.coveragerc'
warning: no previously-included files found matching '.mailmap'
warning: no previously-included files found matching '.travis.yml'
warning: no previously-included files found matching '.landscape.yml'
warning: no previously-included files found matching 'src/pip/_vendor/Makefile'
warning: no previously-included files found matching 'tox.ini'
warning: no previously-included files found matching '*-requirements.txt'
warning: no previously-included files found matching 'appveyor.yml'
warning: no previously-included files found matching 'src/pip/_vendor/six'
warning: no previously-included files matching '*.pyi' found under directory 'src/pip/_vendor'
no previously-included directories found matching '.github'
no previously-included directories found matching '.travis'
no previously-included directories found matching 'docs/build'
no previously-included directories found matching 'news'
no previously-included directories found matching 'contrib'
no previously-included directories found matching 'tasks'
no previously-included directories found matching 'tests'
creating /Library/Python/2.7/site-packages/pip-10.0.1-py2.7.egg
Extracting pip-10.0.1-py2.7.egg to /Library/Python/2.7/site-packages
Adding pip 10.0.1 to easy-install.pth file
Installing pip script to /usr/local/bin
Installing pip2.7 script to /usr/local/bin
Installing pip2 script to /usr/local/bin

Installed /Library/Python/2.7/site-packages/pip-10.0.1-py2.7.egg
Processing dependencies for pip
Finished processing dependencies for pip

# maple @ iMac in ~/Maple [14:26:43]
$ which pip
/usr/local/bin/pip

iPython

iPython 这是一个很好 Python 交互环境开发工具 “brew install iPython” 就可以安装

1
2
3
4
5
6
$ ipython
Python 3.6.5 (default, Apr 25 2018, 14:23:58)
Type 'copyright', 'credits' or 'license' for more information
IPython 6.4.0 -- An enhanced Interactive Python. Type '?' for help.

In [1]:

详细了解,可以通过 iPython Documentation

Python 绝技 之 入门

发表于 2016-01-03 | 分类于 Python

准备开发 & 安装第三方库

Python 环境在 Mac 上已经自带。并提供了 Python 标准库和解释器,以及一些内置模块,这些内置模块包括:内置数据类型、异常处理、numeric 和数学模块、文件处理模块、加密服务、与操作系统相互交互操作、网络、与 IP 协议交互以及其他有用模块。
同样 Python 也提供第三方软件包:https://pypi.org

三种方式:

  • 下载第三方库包,解压,然后通过 python setup.py install 命令进行安装
  • sudo easy_install 包名字

第二种方式,是 Python 为了使得包安装更加方便,在 setuptools 中提供了 easy_install 的模块,当执行这个模块的时候,我们需要将包名作为参数传递给它,然后它会自动到 Python 官网上搜索这个包,如果找到就下载并且自动安装。

安装 python-nmap 模块

1
2
3
4
5
6
7
8
9
10
11
12
13
14
15
16
17
18
 sudo easy_install python-nmap
Password:
Searching for python-nmap
Reading https://pypi.python.org/simple/python-nmap/
Best match: python-nmap 0.6.1
Downloading https://files.pythonhosted.org/packages/dc/f2/9e1a2953d4d824e183ac033e3d223055e40e695fa6db2cb3e94a864eaa84/python-nmap-0.6.1.tar.gz#sha256=80ba0eb10a52283a54a633f40b5baa9c2ff08675d6621dd089ead942852f5bd3
Processing python-nmap-0.6.1.tar.gz
Writing /tmp/easy_install-kCnkg1/python-nmap-0.6.1/setup.cfg
Running python-nmap-0.6.1/setup.py -q bdist_egg --dist-dir /tmp/easy_install-kCnkg1/python-nmap-0.6.1/egg-dist-tmp-hh31Lx
/System/Library/Frameworks/Python.framework/Versions/2.7/lib/python2.7/distutils/dist.py:267: UserWarning: Unknown distribution option: 'bugtrack_url'
warnings.warn(msg)
zip_safe flag not set; analyzing archive contents...
Copying python_nmap-0.6.1-py2.7.egg to /Library/Python/2.7/site-packages
Adding python-nmap 0.6.1 to easy-install.pth file

Installed /Library/Python/2.7/site-packages/python_nmap-0.6.1-py2.7.egg
Processing dependencies for python-nmap
Finished processing dependencies for python-nmap

多个包一起安装也是可以的:

1
$ sudo easy_install pyPdf pygeoip mechanize BeautifulSoup4

还有一些第三方库可能无法通过 easy_install 来安装,可以通过 apt-get install 进行安装, 这是 Linux 下默认的安装工具,在 Mac 下可以通过 brew 来代替, 但是还是有一些库可能 brew 没有,所以需要在 Mac 下装载 apt-get 命令

1
2


Python 标准库的关键组件

  • 变量,不需要声明,类型自动匹配
  • 字符串,upper(),lower(),replace(),find()

    List(列表),就是数组元素

1
2
3
4
5
6
7
8
9
10
11
12
13
14
15
16
17
18
19
20
21
22
23
24
25
26
In [22]: portList=[]

In [23]: type(portList)
Out[23]: list

In [24]: portList.append(21)

In [25]: portList.append(25)

In [26]: portList.append(443)

In [27]: portList.append(80)

In [28]: portList
Out[28]: [21, 25, 443, 80]

In [29]: portList.sort()

In [30]: portList
Out[30]: [21, 25, 80, 443]

In [31]: portList.index(80)
Out[31]: 2

In [32]: len(portList)
Out[32]: 4

字典

1
2
3
4
5
6
7
8
9
10
11
12
13
14
15
In [15]: service={'ftp':21,'ssh':22,'stmp':25,'http':80}
In [17]: service.keys()
Out[17]: dict_keys(['ftp', 'ssh', 'stmp', 'http'])
In [19]: service.items()
Out[19]: dict_items([('ftp', 21), ('ssh', 22), ('stmp', 25), ('http', 80)])
In [20]: service['ftp']
Out[20]: 21

In [21]: service['https']
---------------------------------------------------------------------------
KeyError Traceback (most recent call last)
<ipython-input-21-07c66fb7e9f9> in <module>()
----> 1 service['https']

KeyError: 'https'

网络

socket 模块提供了一个用 Python 进行网络连接的库。

Client:

1
2
3
4
5
6
7
8
9
10
11
#!/usr/bin/env python
# coding=utf-8
import socket

ip_port = ('127.0.0.1',8989)
sk = socket.socket()
sk.connect(ip_port)

ans = sk.recv(1024)

print(ans)

server:

1
2
3
4
5
6
7
8
9
10
11
12
13
14
#!/usr/bin/env python
# coding=utf-8

import socket

ip_port = ('127.0.0.1',8989)
sk = socket.socket()
sk.bind(ip_port)
sk.listen(5)

while True:
conn,address = sk.accept()
conn.sendall('220 FreeFloat Ftp Server (Version 1.00).')
conn.close()

条件选择

1
2
3
4
5
6
7
8
9
10
11
12
13
14
15
16
17
18
#!/usr/bin/env python
# coding=utf-8
import socket

ip_port = ('127.0.0.1',8989)
sk = socket.socket()
sk.connect(ip_port)

ans = sk.recv(1024)

if ("FreeFloat Ftp Server (Version 1.00)." in ans):
print("FreeFloat FTP Server is vulnerable.")
elif ("3COm 3CDaemon FTP Server Version 2.0" in ans):
print ("3CDaemon FTP Server is vulnerable.")
elif ("Sami 3CDaemon FTP Server Version 2.0" in ans):
print ("Sami FTP Server is vulnerable.")
else:
print("no ftp server is vulnerable.")

执行:

1
2
$ python client.py
FreeFloat FTP Server is vulnerable.

异常处理

这里,还是通过上面的连接,将 ip 做一下修改,改为 127.0.1.1,然后设置超时时间为 3 秒,通过 try - except 进行异常处理

1
2
3
4
5
6
7
8
9
10
11
#!/usr/bin/env python
# coding=utf-8
import socket
ip_port = ('127.0.1.1',8989)
socket.setdefaulttimeout(3)
sk = socket.socket()

try:
sk.connect(ip_port)
except Exception, e:
print("Error = " + str(e))

运行:

1
2
$ python client.py
Error = timed out

函数

创建一个函数完成连接到 FTP服务器并返回 banner 的操作:

1
2
3
4
5
6
7
8
9
10
11
12
13
14
15
16
17
18
19
20
21
22
23
24
#!/usr/bin/env python
# coding=utf-8
import socket

def returnBanner(ip,port):
try:
socket.setdefaulttimeout(3)
sk = socket.socket()
sk.connect((ip,port))
banner = sk.recv(1024)
return banner.decode('utf-8')
except Exception as e:
print("Error = " + str(e))
return


def main():
ip = '127.0.0.1'
port = 8989

print(ip + " " + str(port) + ": \n" + returnBanner(ip,port))

if __name__ == '__main__':
main()

循环

使用 for 循环遍历整个子网

1
2
for x in range(1,255):
print("192.169.1." + str(x))

output:

1
2
3
4
5
6
7
8
9
10
$python3 loop.py

192.169.1.1
192.169.1.2
192.169.1.3
192.169.1.4
...
192.169.1.252
192.169.1.253
192.169.1.254

接下来,通过遍历 list 中所有的端口以及输出所有的 ip 和 port 组合

1
2
3
4
5
6
7
8
9
10
11
12
13
14
print("所有子网:")
for x in range(1,255):
print("192.169.1." + str(x))

postList = [21,22,25,80,110]
print("所有端口:")
for port in postList:
print(port)

print("ip 和 port 所有可能组合")

for ip in range(1,255):
for port in postList:
print("192.169.1." + str(ip) + ":" + str(port))

有了迭代 IP 和 port 的能力,就可以来检测子网中所有的 ip 地址,以及 telnet、ssh、smtp、http、imap 及 https 协议的端口

文件 I/O

通过 readline() 函数读取文件 banners.txt 内容,与服务端中 banner 信息进行对比:

banner.txt

1
2
3
4
5
6
7
8
9
10
11
12
3Com 3CDame FTP Server Version 1.00
Ability Server 2.34
PSO Proxy 0.9
Spipe 1.0
TelServer FTP 1.20
Xitmai
Maple FTP 1.90
FreeFloat2 Ftp Server (Version 1.00)
FreeFloat Ftp Server (Version 1.00)
IMAP Server 1.00
Jack 1.0
Tom 99

service.py

1
2
3
4
5
6
7
8
9
10
11
12
13
14
#!/usr/bin/env python
# coding=utf-8

import socket

ip_port = ('127.0.0.1',8989)
sk = socket.socket()
sk.bind(ip_port)
sk.listen(5)

while True:
conn,address = sk.accept()
conn.sendall('220 FreeFloat Ftp Server (Version 1.00).')
conn.close()

client.py

1
2
3
4
5
6
7
8
9
10
11
12
13
14
15
16
17
18
19
20
21
22
23
24
25
26
27
28
29
30
31
32
#!/usr/bin/env python
# coding=utf-8
import socket

def checkBanner(banner):
f = open("banners.txt",'r')
for line in f.readlines():
if line.strip('\n') in banner:
return True
else:
return False

def returnBanner(ip,port):
try:
socket.setdefaulttimeout(3)
sk = socket.socket()
sk.connect((ip,port))
banner = sk.recv(1024)
if checkBanner(banner.decode('utf-8')):
return banner.decode('utf-8')
return "nothing"
except Exception as e:
print("Error = " + str(e))
return

def main():
ip = '127.0.0.1'
port = 8989
print(ip + " " + str(port) + ": \n" + returnBanner(ip,port))

if __name__ == '__main__':
main()

sys

通过内置 sys 模块,我们可以访问到有 Python 解释器使用或者维护的对象,其中包括标志、版本、整型数最大值、可用模块、hook 路径、标准错误/输入/输出的位置,以及调用解释器的命令行参数。
在线文档:
http://docs.python.org/library/sys/

从外部读取文件名字:

1
2
3
4
5
6
import sys

if len(sys.argv)==2:
filename = sys.argv[1]

print ("read the content from: " + filename)

执行:

1
2
$ python sys.py banners.txt
read the content from: banners.txt

OS 模块

内置 OS 模块提供了丰富的操作系统函数。这个模块允许程序独立的与操作系统环境、文件系统、用户数据库以及权限进行交互。比如上面我们在读取文件的时候提前检查一下文件是否存在:

文件是否存在 API:
os.path.isfile(‘fileName’)

1
2
3
4
5
6
7
8
9
10
In [1]: import os

In [2]: ls
banners.txt client.py loop.py service.py sys.py

In [3]: os.path.isfile("banner.txt")
Out[3]: False

In [4]: os.path.isfile("banners.txt")
Out[4]: True

权限 API:
os.access(“fileName”,权限控制)

1
2
3
4
5
6
7
8
9
10
11
12
13
14
15
16
17
In [1]: import os

In [2]: os.access("a.out", os.R_OK)
Out[2]: True

In [3]: os.access("a.out", os.W_OK)
Out[3]: True

In [4]: ls
a.c banners.txt loop.py sys.py
a.out* client.py service.py

In [5]: os.access("/usr/bin/host", os.W_OK)
Out[5]: False

In [6]: os.access("/usr/bin/host", os.R_OK)
Out[6]: True

OVER>>>>>>>>>>>>>>

Foundation-NSObject

发表于 2016-01-01 | 分类于 NSFoundation

NSObject 是大部分OC类的父类,继承NSObject,可以获取访问运行时的接口,并且具备了OC对象的基本功能。
NSObject 实现了 协议,也就是拥有了一簇接口。

初始化类

初始化类,提供了两个API, + initialize 和 + load 。

+ initialize

在类收到第一条消息的时候初始化这个类。(即第一次使用这个类的时候,调用这个方法。如果项目中没有使用这个类,这个方法不会被调用)

方法声明
1
+ (void)initialize
讨论

在类或者子类收到第一条消息前,运行时向每个类发送 initialize消息。父类在子类之前收到这个消息。运行时向这些类发送 initialize消息是线程安全的。也就是当第一个线程向一个类发送消息的时候,其他的线程如果想这个类发送消息就会被阻塞,知道第一个线程的消息结束。

如果子类没有实现 initialize 方法,父类中的 initialize 方法可能会被调用多次。如果你想让父类中的 initialize 方法只调用一次,可以使用下面的结构:

1
2
3
4
5
+ (void)initialize {
if (self == [ClassName self]) {
// ... do the initialization ...
}
}

因为 initialize 是以阻塞的方式调用的,所以要控制好该方法中的工作量。尽量避免在该方法中使用线程锁,因为这可能导致死锁。除此之外,尽量减少在该方法中执行复杂的操作。

附加

每个类只会调用一次 initialize 方法,如果你想独立的初始化一个类或者该类的类目,那么应该实现+ load 方法。

+ load

当类或者是类目被添加到运行时的时候,就会调用该方法。如果想对类做一些特别的处理,那么可以实现 +load方法。

方法声明
1
+ (void)load;
讨论

初始化方法调用的顺序:

  • 父类的 + load 方法先于子类的+load 方法调用;
  • 子类的 +load 方法先于类目的调用

这里有一部分官方文档没看懂,先记记录调用顺序吧

创建、拷贝和销毁对象

+ alloc

为接收该消息者创建一个实例。

示例
1
TheClass *newObject = [[TheClass alloc] init];
讨论
  • 如果你想要初始化类中的某些东西,不要重写这个方法,应该去重写 init 方法
  • 因为历史原因, alloc 方法会调用 allocWithZone: 这个方法

+ allocWithZone:

为接收该消息者创建一个实例。

方法声明
1
+ (instancetype)allocWithZone:(struct _NSZone *)zone;

参数 zone 被忽略了已经

示例
1
TheClass *newObject = [[TheClass allocWithZone:nil] init];
讨论
  • 如果你想要初始化类中的某些东西,不要重写这个方法,应该去重写 init 方法
  • 这个方法的存在是历史遗留问题, memory zone 在 OC 中已经被丢弃了。

- init

当一个对象分配到一块内存之后,这个方法用来初始化这个对象,并将初始化之后的对象返回

方法声明
1
- (instancetype)init;
返回值

两种情况:

  • 初始化之后的对象;
  • nil ,如果在初始化的过程中出现未知异常,该方法可能会返回 nil
    讨论
    init 方法是和 alloc(或者 *allocWithZone:) 方法一起调用的。
    1
    SomeClass *object = [[SomeClass alloc] init];

一个对象如果没有通过(init) 方法初始化是不可以被使用的(也就是不可以接受消息)。
如果想要自定义这个方法的实现,首先要调用父类的 init 方法,然后再去做你自己的初始化以及返回一个新的对象。如果这个新对象没有初始化成功,那么必须返回 nil。比如,一个 BuiltInCamera 在一部没有摄像头的手机上运行时,初始化方法只能返回 nil。

实例
1
2
3
4
5
6
- (instancetype)init {
if (self = [super init]) {
// Initialize self
}
return self;
}

在 Xcode 中写 init 方法的时候 ,只需要输入 init 几个字母之后,就可以看到完整的方法提示了,注意不要输入 “-” 否则提示就不会出现了。

- copy

调用该方法,会返回一个 copyWithZone 方法的结果

方法声明
1
- (id)copy;
返回值

这个返回值是 NSCopying 协议中的 copyWithZone: 方法的返回值

讨论

这个方法很方便的让类可以实现 NSCopying协议。 如果调用 copy方法的类没有实现 NSCopying协议,那么就会抛出异常。

1
*** Terminating app due to uncaught exception 'NSInvalidArgumentException', reason: '-[Whale copyWithZone:]: unrecognized selector sent to instance 0x60400000ecc0'

Whale 这个类没有实现 copyWithZone: 这个方法,解决方法就是:

1
2
3
4
5
6
7
8
9
10
11
12
13
14
15
16
17
// Whale.h
#import <Foundation/Foundation.h>

@interface Whale : NSObject<NSCopying>

@end

// Whale.m
#import "Whale.h"

@implementation Whale

- (id)copyWithZone:(NSZone *)zone {
return self;
}

@end

当然,如果缺少了 @interface Whale : NSObject 也是可以的,因为我们实现了 copyWithZone: 这个方法。此时程序不会报错。
值得注意的是, NSObject 类并不支持 NSCopying 协议,但是子类必须支持此协议,并且实现 copyWithZone: 这个方法,当然前提是你如果想要调用 copy 方法。
如果子类不是直接继承了 NSObject 类,那么在实现copyWithZone: 方法的时候,首先要调用父类的copyWithZone: 方法,将父类的实现合并到子类中。例如, Whale 继承自 NSObject 那么它就不需要调用父类的 copyWithZone: ,但是 AliceWhale 继承自 Whale 类,那么就必须先调用父类的*copyWithZone:方法 ,合并父类的copy 内容:

1
2
3
4
5
6
7
8
9
10
11
12
13

@interface AliceWhale : Whale

@end

@implementation AliceWhale


- (id)copyWithZone:(NSZone *)zone {
[super copyWithZone:zone];
return self;
}
@end

-copyWithZone:

没啥好说的
This method exists so class objects can be used in situations where you need an object that conforms to the NSCopying protocol. For example, this method lets you use a class object as a key to an NSDictionary object. You should not override this method.
这一段话以后再去理解吧,没看懂。

- mutableCopy

返回 mutableCopyWithZone: 的返回值
具体使用逻辑和 copy 类似,只是一个是不可变的一个是可变的

- dealloc

取消对象占用的内存的时候调用这个方法。

讨论
  • 在该方法的实现中释放一些资源;
  • 不能直接调用此方法,该方法是runtime调用具体参见Advanced Memory Management Programming Guide
  • ARC 下不能 [super dealloc]
    • MRC 下必须调用 [super dealloc],而且必须写在方法最后

识别类

这里主要有三个类方法

  • + class , 返回类对象
  • + superclass, 返回父类类对象
  • + isSubclassOfClass: , 返回一个 Boolean 值,

+ class

返回 类对象

讨论

要引用一个类,必须通过类的名字,初次之外其他的情况我们可以通过这个方法来获取一个类对象。

+ superclass

返回父类的类对象

+isSubclassOfClass:

验证调用该方法的类是否继承自参数给定的类(包括父类的父类也会返回YES)

检测实例方法

+ instancesRespondToSelector:

返回一个BOOL值,来表示实例是否能够相应方法

方法声明

1
+ (BOOL)instancesRespondToSelector:(SEL)aSelector;

讨论

该方法检测调用类中是否实现了某个实例方法(aSelector),而不是类方法,如果要检测类方法,那么可以调用协议 中的 respondsToSelector: 方法。
如果只是在 .h 文件中声明了该方法,而没有在 .m 中去实现这个方法,检测结果为 NO。


检测协议

返回一个BOOL值, 来表示调用该方法的类是否实现了对应的协议(参数)

声明
1
+ (BOOL)conformsToProtocol:(Protocol *)protocol;
使用示例
1
BOOL canJoin = [MyClass conformsToProtocol:@protocol(Joining)];
讨论
  1. MyClass 实现了 AffiliationRequests 和 AffiliationRequests 协议

    1
    2
    @interface MyClass : NSObject <AffiliationRequests, Normalization>
    @end
  2. 协议之间的合并 AffiliationRequests 合并了 Joining 协议

    1
    2
    @protocol AffiliationRequests <Joining>
    @end
  3. 如果 MyClass 实现了AffiliationRequests协议,同样实现了 Joining, conformsToProtocol 返回结果为YES

  4. conformsToProtocol: 该方法不会检测程序有没有实现协议中的方法,只会检测在类的声明后面有没有。
  5. 即使你实现了协议的方法,但是没有在类的声明后面通过尖括号包含协议的名字,那么该方法返回仍为NO

获取方法信息

- methodForSelector:

返回方法实现的地址

方法声明
1
- (IMP)methodForSelector:(SEL)aSelector;

IMP 方法(函数)指针,也就是实现方法的地址
参数 aSelector必须合法,在传入作为参数之前,可以通过 responseToSelector 检查该参数指向的方法是否已经实现了

1
2
3
4
5
6
MethodInfor *mObj = [MethodInfor new];
if ([mObj respondsToSelector:@selector(sayHello)]) {
IMP imp = [mObj methodForSelector:@selector(sayHello)];
NSLog(@"%p",imp);
imp();// 执行了 sayHello 方法
}
讨论

方法的调用者如果是 类 那么 aSelector 必须是类方法;
方法的调用者如果是 实例 那么 aSelector 必须是实例方法

+ instanceMethodForSelector:

返回实例方法实现的地址

方法声明
1
+ (IMP)instanceMethodForSelector:(SEL)aSelector;

IMP 方法(函数)指针,也就是实现方法的地址
参数 aSelector必须合法,在传入作为参数之前,可以通过 instanceMethodForSelector 检查该参数指向的方法是否已经实现了

示例
1
2
3
4
5
if ([MethodInfor instancesRespondToSelector:@selector(sayHello)]  ) {
IMP imp = [MethodInfor instanceMethodForSelector:@selector(sayHello)];
NSLog(@"%p",imp);
imp();
}
讨论

该方法只用来检测 类 中的实例有没有实现实例方法,不能检测类方法。检测类方法使用 methodForSelector: 。

+ instanceMethodSignatureForSelector:

返回方法签名对象NSMethodSignature

方法声明
1
+ (NSMethodSignature *)instanceMethodSignatureForSelector:(SEL)aSelector;
示例
1
NSMethodSignature *sayHelloSignature = [MethodInfor instanceMethodSignatureForSelector:@selector(sayHello)];
讨论

该方法会返回一个方法的签名对象,如果类的对象不能响应这个方法,那么会返回一个 nil 对象。

- methodSignatureForSelector:

返回方法签名对象NSMethodSignature

方法声明
1
- (NSMethodSignature *)methodSignatureForSelector:(SEL)aSelector;
示例
1
NSMethodSignature *sayHelloSignature = [MethodInfor instanceMethodSignatureForSelector:@selector(sayHello)];
讨论

该方法会返回一个方法的签名对象,如果类的对象不能响应这个方法,那么会返回一个 nil 对象。
该方法针对类和对象都可以。
这里与
This method is used in the implementation of protocols. This method is also used in situations where an NSInvocation object must be created, such as during message forwarding. If your object maintains a delegate or is capable of handling messages that it does not directly implement, you should override this method to return an appropriate method signature. 没看懂,等了解了 NSInvocation 之后再来看看。

SQLite FTS3 and FTS4 Extensions

发表于 2015-06-01 | 分类于 DataBase

介绍

Ref

  1. SQLite FTS3 and FTS4 Extensions

iOS 开发 Tips

发表于 2015-02-02 | 分类于 iOS

记录在开发过程中的一些小技巧的使用

TableView

取消 table view 的 section 悬停

有时候,通过使用 sectionView 实现tableView的间隔效果,但是不想让这个间隔悬停。

1
2
3
4
5
6
7
8
9
- (void)scrollViewDidScroll:(UIScrollView *)scrollView {

CGFloat sectionHeaderHeight = 12;
if (scrollView.contentOffset.y<=sectionHeaderHeight&&scrollView.contentOffset.y>=0) {
scrollView.contentInset = UIEdgeInsetsMake(-scrollView.contentOffset.y, 0, 0, 0);
} else if (scrollView.contentOffset.y>=sectionHeaderHeight) {
scrollView.contentInset = UIEdgeInsetsMake(-sectionHeaderHeight, 0, 0, 0);
}
}

tableView 中有输入框,键盘隐藏 - UITableViewController 的效果

通过实现UITableViewController中控制键盘的效果,又不使用UITableViewController

1
2
3
4
5
6
7
8
9
10
11
12
13
14
15
16
17
- (UITableView *)tableView {
if (!_tableView) {

_tableView = [[UITableView alloc] initWithFrame:CGRectZero style:UITableViewStylePlain];
//处理键盘弹出tableView自动像是移动一段距离
UITableViewController *tvc = [[UITableViewController alloc] initWithStyle:UITableViewStylePlain];
[self addChildViewController:tvc];
_tableView = tvc.tableView;

_tableView.delegate = self;
_tableView.dataSource = self;

// ...

}
return _tableView;
}

布局

其他

FMDB 源码(一)

发表于 2014-07-10 | 分类于 Database

FMDB 简介

FMDB 瞎说123

FMDB 是在 sqlite 的 Objective-C 版本。在 iOS 开发过程中,用到数据库的第三方大部分都会选择这个库,好早之前就用到了,这次抽了时间看看主要实现。

数据库所做的就是 CRUD 操作,那么 FMDB 要做的便是将 sqlite C API 中的 CRUD 操作以及其他数据库的操作转换成 Objective-C 的 API 。

为什么看 FMDB 源码?

(▼へ▼メ)
FMDB 的 REAMDME 大体浏览一遍,其对 ARC 环境编译期间的识别,以及其多线程的安全让我想探究一下他们是如何实现的,是通过什么样的技术去做到的,当然还有一部分就是我想看一下 FMDB 的单元测试是怎么做的,大概总结如下

  • ARC 和 非 ARC 的编译器区分如何实现
  • 多线程安全如何实现
  • UnitTest 如何去做
  • FMDB 如何支持 swift 呢?

尤其是最后这条,我没有看到 FMDB 有 Swift 的版本,那么他是如何支持 Swift 的呢?

FMDB 结构

  1. FMDatabase Class 主要数据库类,线程安全

    FMDB 之 FMDatabase Class

读源码学习知识

这里记录的是学习到 FMDB 解决某些问题的方式

  • ARC 和 非 ARC 区分
  • 可变参数
  • 参数约束
  • 方法丢弃

FMDB 如何支持 非 ARC 和 ARC

1
2
3
4
5
6
7
8
9
10
11
12
13
14
15
16
17
18
19
20
21
#if ! __has_feature(objc_arc)
#define FMDBAutorelease(__v) ([__v autorelease]);
#define FMDBReturnAutoreleased FMDBAutorelease

#define FMDBRetain(__v) ([__v retain]);
#define FMDBReturnRetained FMDBRetain

#define FMDBRelease(__v) ([__v release]);

#define FMDBDispatchQueueRelease(__v) (dispatch_release(__v));
#else
// -fobjc-arc
#define FMDBAutorelease(__v)
#define FMDBReturnAutoreleased(__v) (__v)

#define FMDBRetain(__v)
#define FMDBReturnRetained(__v) (__v)

#define FMDBRelease(__v)

#endif

上面这部分代码便是如何实现 ARC 和 非 ARC 情况的宏定义,不错,就是通过宏定义来区分的,看一下实现的代码:

1
2
3
4
5
6
7
+ (instancetype)databaseQueueWithPath:(NSString *)aPath flags:(int)openFlags {
FMDatabaseQueue *q = [[self alloc] initWithPath:aPath flags:openFlags];

FMDBAutorelease(q);

return q;
}

在使用的地方,根据 ARC 或者 非 ARC 的情况,因为通过宏定义,如果是使用了 retain 的地方,那么在 ARC 下就是空的,如果使用了自动释放池,那么在 ARC 下便是原样儿不变,除此之外,还有 dealloc 方法:

1
2
3
4
5
6
7
8
9
10
11
12
13
- (void)dealloc {
FMDBRelease(_db);
FMDBRelease(_path);
FMDBRelease(_vfsName);

if (_queue) {
FMDBDispatchQueueRelease(_queue);
_queue = 0x00;
}
#if ! __has_feature(objc_arc)
[super dealloc];
#endif
}

FMDB 如何实现 Objective-C 方法可变参数(两种方式)

没有格式

1
- (BOOL)executeUpdate:(NSString*)sql, ...;

这个方法是 FMDB 中用来执行 sql 语句的,对于 sql 中的 insert 语句而言可以做如下执行:

1
2
3
4
5
6
7
8
NSString *inputName = @"Tom";
NSInteger inputAge = 34;
NSInteger selectGender = 1;

[db executeUpdate:@"insert into Teacher (name,age,sex) values (?, ?, ?)",
inputName,
@(inputAge),
@(selectGender)];

这里就是可变参数了,而且参数没有限制。怎么实现的呢 ?

1
2
3
4
5
6
7
8
9
- (BOOL)executeUpdate:(NSString*)sql, ... {
va_list args;
va_start(args, sql);

BOOL result = [self executeUpdate:sql error:nil withArgumentsInArray:nil orDictionary:nil orVAList:args];

va_end(args);
return result;
}

通过 va_list 这种宏定义方式进行解析,而且 sql 语句貌似可以直接接受 va_list 参数

有格式

什么是有格式呢 ?

1
- (BOOL)executeUpdateWithFormat:(NSString *)format, ... NS_FORMAT_FUNCTION(1,2);

怎么使用呢 ?

1
[db executeUpdateWithFormat:@"insert into Teacher (name,age,sex) values (%@, %d, %d)",inputName,inputAge,selectGender];

可以看到,这种模式我们并不陌生,我们称之为:格式化字符串。像 NSString 就有这么一个方法,我们经常在用:

1
2
+ (instancetype)stringWithFormat:(NSString *)format, ... NS_FORMAT_FUNCTION(1,2);
+ (instancetype)localizedStringWithFormat:(NSString *)format, ... NS_FORMAT_FUNCTION(1,2);

这里是在方法声明的后面添加了 NS_FORMAT_FUNCTION(1,2) 一个宏定义便 OK 了,那么如何解析这些参数呢?

1
2
3
4
5
6
7
8
9
10
11
12
13
- (BOOL)executeUpdateWithFormat:(NSString*)format, ... {
va_list args;
va_start(args, format);

NSMutableString *sql = [NSMutableString stringWithCapacity:[format length]];
NSMutableArray *arguments = [NSMutableArray array];

[self extractSQL:format argumentsList:args intoString:sql arguments:arguments];

va_end(args);

return [self executeUpdate:sql withArgumentsInArray:arguments];
}

是的和上面的解析方式一样,但是我们要看到如何解析到字符串和数字呢?

1
2
3
4
5
6
7
8
9
10
11
12
13
14
15
16
17
18
19
20
21
22
23
24
25
26
27
28
29
30
31
32
33
34
35
36
37
38
39
40
41
42
43
44
45
46
47
48
49
50
51
52
53
54
55
56
57
58
59
60
61
62
63
64
65
66
67
68
69
70
71
72
73
74
75
76
77
78
79
80
81
82
83
84
85
86
87
88
89
90
91
92
93
94
95
96
97
98
99
100
101
102
103
104
105
106
107
108
109
110
111
112
113
114
115
116
117
118
119
- (void)extractSQL:(NSString *)sql argumentsList:(va_list)args intoString:(NSMutableString *)cleanedSQL arguments:(NSMutableArray *)arguments {

NSUInteger length = [sql length];
unichar last = '\0';
for (NSUInteger i = 0; i < length; ++i) {
id arg = nil;
unichar current = [sql characterAtIndex:i];
unichar add = current;
if (last == '%') {
switch (current) {
case '@':
arg = va_arg(args, id);
break;
case 'c':
// warning: second argument to 'va_arg' is of promotable type 'char'; this va_arg has undefined behavior because arguments will be promoted to 'int'
arg = [NSString stringWithFormat:@"%c", va_arg(args, int)];
break;
case 's':
arg = [NSString stringWithUTF8String:va_arg(args, char*)];
break;
case 'd':
case 'D':
case 'i':
arg = [NSNumber numberWithInt:va_arg(args, int)];
break;
case 'u':
case 'U':
arg = [NSNumber numberWithUnsignedInt:va_arg(args, unsigned int)];
break;
case 'h':
i++;
if (i < length && [sql characterAtIndex:i] == 'i') {
// warning: second argument to 'va_arg' is of promotable type 'short'; this va_arg has undefined behavior because arguments will be promoted to 'int'
arg = [NSNumber numberWithShort:(short)(va_arg(args, int))];
}
else if (i < length && [sql characterAtIndex:i] == 'u') {
// warning: second argument to 'va_arg' is of promotable type 'unsigned short'; this va_arg has undefined behavior because arguments will be promoted to 'int'
arg = [NSNumber numberWithUnsignedShort:(unsigned short)(va_arg(args, uint))];
}
else {
i--;
}
break;
case 'q':
i++;
if (i < length && [sql characterAtIndex:i] == 'i') {
arg = [NSNumber numberWithLongLong:va_arg(args, long long)];
}
else if (i < length && [sql characterAtIndex:i] == 'u') {
arg = [NSNumber numberWithUnsignedLongLong:va_arg(args, unsigned long long)];
}
else {
i--;
}
break;
case 'f':
arg = [NSNumber numberWithDouble:va_arg(args, double)];
break;
case 'g':
// warning: second argument to 'va_arg' is of promotable type 'float'; this va_arg has undefined behavior because arguments will be promoted to 'double'
arg = [NSNumber numberWithFloat:(float)(va_arg(args, double))];
break;
case 'l':
i++;
if (i < length) {
unichar next = [sql characterAtIndex:i];
if (next == 'l') {
i++;
if (i < length && [sql characterAtIndex:i] == 'd') {
//%lld
arg = [NSNumber numberWithLongLong:va_arg(args, long long)];
}
else if (i < length && [sql characterAtIndex:i] == 'u') {
//%llu
arg = [NSNumber numberWithUnsignedLongLong:va_arg(args, unsigned long long)];
}
else {
i--;
}
}
else if (next == 'd') {
//%ld
arg = [NSNumber numberWithLong:va_arg(args, long)];
}
else if (next == 'u') {
//%lu
arg = [NSNumber numberWithUnsignedLong:va_arg(args, unsigned long)];
}
else {
i--;
}
}
else {
i--;
}
break;
default:
// something else that we can't interpret. just pass it on through like normal
break;
}
}
else if (current == '%') {
// percent sign; skip this character
add = '\0';
}

if (arg != nil) {
[cleanedSQL appendString:@"?"];
[arguments addObject:arg];
}
else if (add == (unichar)'@' && last == (unichar) '%') {
[cleanedSQL appendFormat:@"NULL"];
}
else if (add != '\0') {
[cleanedSQL appendFormat:@"%C", add];
}
last = current;
}
}

是的,就是这么一个一个的解析出来的

参数约束

1
2
3
4
5
6
7
NS_ASSUME_NONNULL_BEGIN
+ (instancetype)databaseWithURL:(NSURL * _Nullable)url;

- (instancetype)initWithPath:(NSString * _Nullable)path;

- (instancetype)initWithURL:(NSURL * _Nullable)url;
NS_ASSUME_NONNULL_END

这一对宏中包含的方法中的参数都是必须传入的,否则会报警告,也就是参数不能为 nil。如果,打算让参数可以为 nil 那么就必须在参数类型后面添加 _Nullable, FMDB 初始化方法可以不传入 path ,如上实现。

方法丢弃

这在系统 API 中也经常看到,

1
2
3
4
5
6
7
8
9
10
11
12
13
14
15
16
17
18
19
20
21

//.h 声明

- (BOOL)update:(NSString*)sql withErrorAndBindings:(NSError * _Nullable*)outErr, ... __deprecated_msg("Use executeUpdate:withErrorAndBindings: instead");;


//.m 实现

#pragma clang diagnostic push
#pragma clang diagnostic ignored "-Wdeprecated-implementations"
- (BOOL)update:(NSString*)sql withErrorAndBindings:(NSError**)outErr, ... {
va_list args;
va_start(args, outErr);

BOOL result = [self executeUpdate:sql error:outErr withArgumentsInArray:nil orDictionary:nil orVAList:args];

va_end(args);
return result;
}

#pragma clang diagnostic pop

FMDB 如何支持 Swift 呢?

FMDB 的单元测试

如何看源码?

带着问题去看,带着好奇心去看,快乐的看!
看源码是一件很痛苦的事情,因为这就像一场陌生的旅游,或者是到了别人家里一样!比如有一天别人说:

”啊,那么土地真的很美丽,很有魅力,大家都说它多好多好”

你听说了之后,也不知道自己感不感兴趣,也不知道它哪里美,更不知道你去了要做什么,只知道别人说去过那里的人都很 NB ,所以你去了,这不是一场旅行,这是一场灾难,绝对的,因为你对它太陌生了,陌生到你处处碰壁,无路可走。

很多时候,我们觉得漫无目的的浏览风光觉得很好,但是,当你意识到生命的短暂,时间的流逝的时候,让你这么做,那绝对绝对是谋杀了。记得以前总觉得自己总是被枷锁锁住,后来我将枷锁打破,然后自己慢慢的静待时光流逝,我以为这种感觉会很好,但是当时间流逝了一段时间之后,我感到疲惫,感到不安,这就如同我们在看源码的时候,漫无目的的去看,都知道这个框架好,那个代码写的优美,但是你真的懂得怎么去欣赏这里的景色了么?

当你想去买房子的时候,你才会去关注房价,关注房屋设计,关注各个城市之间的区别等等。为此,你猜了解到了,原来房子需要这样那样,原来周边环境也很重要,原来这种材料是一般般的等等的问题。而如果你从未打算去买房子,那么别人邀你一起去看房子,即使那房子再美,我想你看到的也就是那句 “房子不错” 其他的你也许真的真的看不出来了。

所以,如果你打算去看一个源码,那么最好最好准备,你要得到什么,为什么去看,相信我,如果你知道了这些,真的会事半功倍!

就如同现在区块链很火,很多人都去看,算法也很火,很多人都去学,我看到好多人都去分享那些xxxx课程,xxxx讲座,xxxx多少天让你了解,我没有去看过,我只在乎那些我需要的东西。

就如同,我要实现可变参数,我要实现一个库支持 Objective-C 和 Swift 一样,just this!

还有一个原因就是,你永远不可能知道第三方库为什么要写成这样?真的,第三方库为什么要实现这样或者那样的需求,这些事情要问作者,而作者也不会知道,你我都是 coding 的,我们都知道需求写完了之后的事情就是没有问题我们便会会提起!所以好多东西本来便没有了来源,你再怎么看也是那个样子,所以索性让第三方库围绕着你走,你要什么便到里面去寻找就 OK 了。

sqlite tour

发表于 2014-06-01 | 分类于 DataBase

[toc]

sqlite3 program

Mac OS 上已经预装了 sqlite3

1
2
$ which sqlite3
/usr/bin/sqlite3

进入 sqlite3 命令行环境,并创建表格

1
2
3
4
5
6
7
8
9
10
11
12
13
$sqlite3 ex1
SQLite version 3.8.5 2014-05-29 12:36:14
Enter ".help" for usage hints.
sqlite> create table tabl2 (
...> f1 varchar(30) primary key,
...> f2 text,
...> f3 real
...> );

insert into tabl2 values ('Jack','male',12.6);
insert into tabl2 values ('Tome','male',12.6);
insert into tabl2 values ('Bob','male',12.6);
insert into tabl2 values ('Rose','fmale',12.6);

dot-command

点命令是 sqlite3 的设置输出命令,有一些规则需要遵循:

  • 必须以 “.” 开头;
  • 单行执行,不支持多行
  • 不能在 SQL 中
  • 不能够写注释

通过 .help 可以查看所有的点命令

注意:

  • sqlite 中 SQL 语句不区分大小写;
  • 每个 SQL 语句都需要分号结束,如果没有分号,Enter 之后,sqlite3 会继续让你输入,知道遇到分号为止

dot-command 修改输出格式

1
2
3
4
5
6
7
sqlite> .tables
tabl2
sqlite> select * from tabl2;
Jack|male|12.6
Tome|male|12.6
Bob|male|12.6
Rose|fmale|12.6

.tables 查看当前数据库中的表, select from tabl2; 查看 tabl2 表中的数据,并且以 list* 方式展示出来。 sqlite3 program 能够以 8 种方式展示输出结果:

  • csv
  • column
  • html
  • insert
  • line
  • list
  • quote
  • tabs
  • tcl

通过 .mode [方式名字] 可以修改当前的展示模式

1
2
3
4
5
6
7
8
9
10
11
12
13
14
15
16
17
18
19
20
21
22
23
24
25
26
27
28
29
30
31
32
33
34
35
36
37
38
39
40
41
sqlite> select * from tabl2;
Jack|male|12.6
Tome|male|12.6
Bob|male|12.6
Rose|fmale|12.6
sqlite> .mode list
sqlite> select * from tabl2;
Jack|male|12.6
Tome|male|12.6
Bob|male|12.6
Rose|fmale|12.6
sqlite> .mode csv
sqlite> select * from tabl2;
Jack,male,12.6
Tome,male,12.6
Bob,male,12.6
Rose,fmale,12.6
sqlite> .mode html
sqlite> select * from tabl2;
<TR><TD>Jack</TD>
<TD>male</TD>
<TD>12.6</TD>
</TR>
<TR><TD>Tome</TD>
<TD>male</TD>
<TD>12.6</TD>
</TR>
<TR><TD>Bob</TD>
<TD>male</TD>
<TD>12.6</TD>
</TR>
<TR><TD>Rose</TD>
<TD>fmale</TD>
<TD>12.6</TD>
</TR>
sqlite> .mode tabs
sqlite> select * from tabl2;
Jack male 12.6
Tome male 12.6
Bob male 12.6
Rose fmale 12.6

默认是 list 模式,上面分别以 list、csv、html、tabs 模式进行展示。
除此之外,.separator 可以修改分隔符,比如我们以 “ ~ “ 作为分割

1
2
3
4
5
6
7
8
9
10
11
12
sqlite> .separator " ~ "
sqlite> select * from tabl2;
Jack ~ male ~ 12.6
Tome ~ male ~ 12.6
Bob ~ male ~ 12.6
Rose ~ fmale ~ 12.6
sqlite> .mode list
sqlite> select * from tabl2;
Jack|male|12.6
Tome|male|12.6
Bob|male|12.6
Rose|fmale|12.6

当然,如果通过 .mode 再次修改输出格式的话, .separator 的操作就会被重置,这一点需要注意。

line & column 模式

通过 .mode line 和 .mode column 可以将输出格式修改成行和列模式,实现如下:

  • 行模式
1
2
3
4
5
6
7
8
9
10
11
12
13
14
15
16
17
sqlite> .mode line
sqlite> select * from tabl2;
f1 = Jack
f2 = male
f3 = 12.6

f1 = Tome
f2 = male
f3 = 12.6

f1 = Bob
f2 = male
f3 = 12.6

f1 = Rose
f2 = fmale
f3 = 12.6
  • 列模式
1
2
3
4
5
6
sqlite> .mode column
sqlite> select * from tabl2;
Jack male 12.6
Tome male 12.6
Bob male 12.6
Rose fmale 12.6

通过 .header on/off 列模式可以将 header 部分展示出来

1
2
3
4
5
6
7
8
sqlite> .header on
sqlite> select * from tabl2;
f1 f2 f3
---------- ---------- ----------
Jack male 12.6
Tome male 12.6
Bob male 12.6
Rose fmale 12.6

修改列宽 .width col1W col2W … colnW

1
2
3
4
5
6
7
8
9
10
11
12
13
14
15
16
17
sqlite> .width 1 10
sqlite> .mode column
sqlite> select * from tabl2;
f f2 f3
- ---------- ----------
J male 12.6
T male 12.6
B male 12.6
R fmale 12.6
sqlite> .width 10 10 10
sqlite> select * from tabl2;
f1 f2 f3
---------- ---------- ----------
Jack male 12.6
Tome male 12.6
Bob male 12.6
Rose fmale 12.6

.width 后面跟着的数字分别表示第几行的宽度,如果没有就是没有限制

插入模式输出

有时候,我们需要在另一个表中插入与当前表相同的数据,那么久可以通过 insert 模式来实现

1
2
3
4
5
6
sqlite> .mode insert new_table
sqlite> select * from tabl2;
INSERT INTO new_table(f1,f2,f3) VALUES('Jack','male',12.599999999999999644);
INSERT INTO new_table(f1,f2,f3) VALUES('Tome','male',12.599999999999999644);
INSERT INTO new_table(f1,f2,f3) VALUES('Bob','male',12.599999999999999644);
INSERT INTO new_table(f1,f2,f3) VALUES('Rose','fmale',12.599999999999999644);

将查询结果写入文件

.output and .once 将 sqlite3 的标准输出重定向到指定文件中

1
2
3
4
5
6
7
8
9
10
11
12
$touch output.txt

sqlite> .output output.txt
sqlite> select * from tabl2;

$ cat output.txt
f1 f2 f3
---------- ---------- ----------
Jack male 12.6
Tome male 12.6
Bob male 12.6
Rose fmale 12.6

.once 用法与 .output 用法一致,只不过 .once 只会让 sliqte3 执行一次非标准输出

1
2
3
4
5
6
7
8
9
sqlite> .once output.txt
sqlite> select * from tabl2;
f1 f2 f3
---------- ---------- ----------
Jack male 12.6
Tome male 12.6
Bob male 12.6
Rose fmale 12.6

通过 ‘|’ 打开保存的文件

1
2
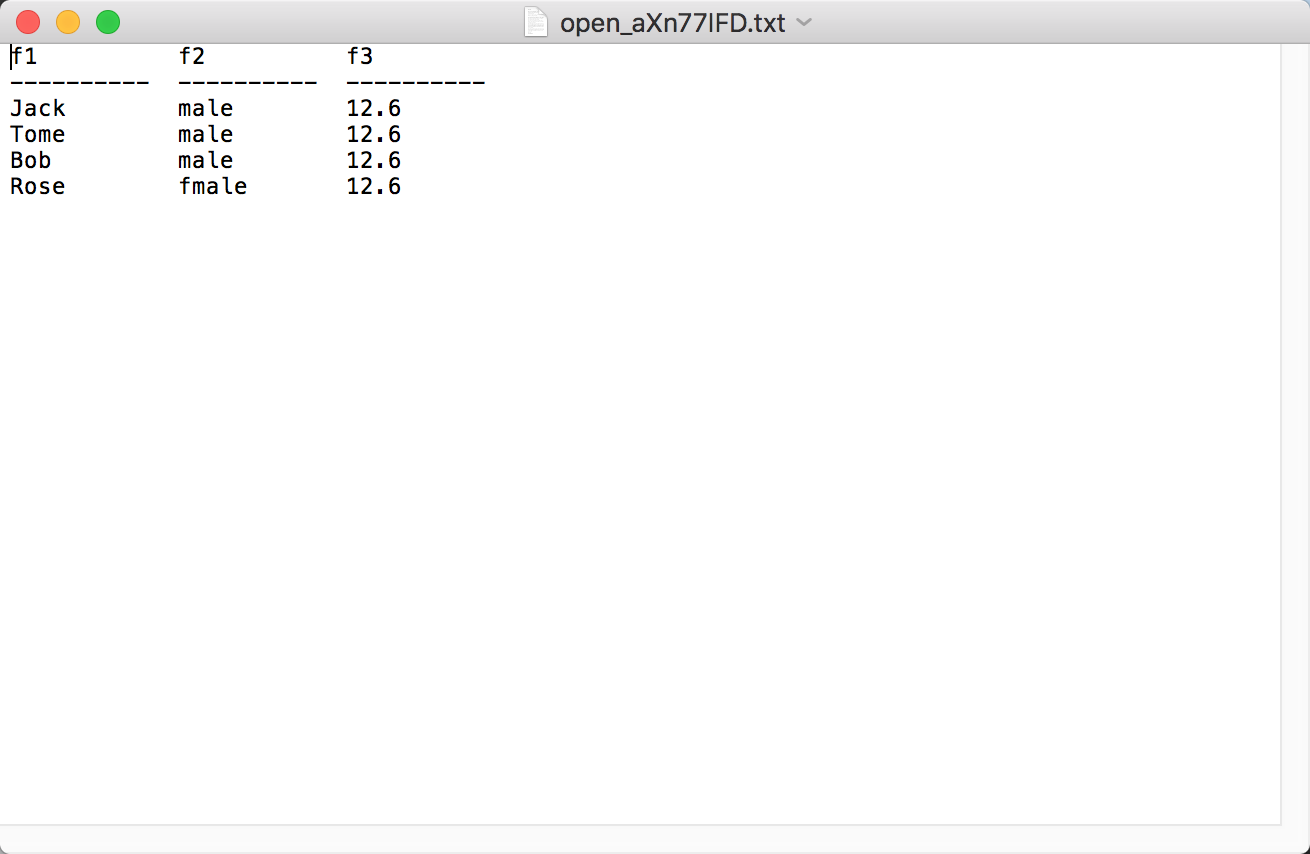
sqlite> .once '|open -f'
sqlite> select * from tabl2;

如图所示,会将结果存储到一个 txt 文件中,然后打开:

File I/O Function

以存储图片为例:

  • 新建一张 images 表
  • 在当前目录中添加一张图片, icon.png
  • readfile(‘icon.png’)
    1
    2
    3
    4
    5
    6
    7
    8
    9
    10
    11
    sqlite> create table images
    ...> (
    ...> name text,
    ...> type text,
    ...> img blob
    ...> );
    sqlite> insert into images(name,type,img) values ('icon','png',readfile('icon.png'));
    sqlite> select * from images;
    name type img
    ---------- ---------- ----------
    icon png �PNG

读取数据库中的图片,writefile(x,y) 负责将图片写入与数据库相同的目录中

1
2
3
4
5
sqlite> select writefile('img.png',img) from images where name = 'icon';
writefile('img.png',img)
------------------------
0
26348

上面实现了 sqlite3 对图片的存储和读取,分别用到了 readfile() 和 writefile() 函数,图片格式为 blob

参考

  1. Command Line Shell For SQLite
  2. W3C-SQL

CocoaPods体验

发表于 2014-03-01 | 分类于 CocoaPods

[TOC]

CocoaPods Wiki

CocoaPods 是一款针对 OC 和 Swift 包以来管理工具(application level dependency manager)。 当然也适合于其他基于 OC 运行时上的语言,比如 RubyMotion,CocoaPods 针对外部扩展库提供了标准格式。它是由 Eloy Duran 和 Fabio Pelosin 以及其他贡献者在 2011 年 8 月开始开发,并在概念 9 月 1 日份发布了第一个版本。 CocoaPods 的健壮性来源于 Ruby 项目 RubyGems 和 Bundler。

CocoaPods 关注于第三方源代码的发布和集成(集成到 Xcode 工程中)。

CocoaPods 在命令行中执行,同样也集成到了 APPCode 的 IDE 中。CocoaPods 通过标准的依赖进行源文件的集成,而不再是通过 Copy 源文件来完成。除此之外,所有的第三方库文件都在一个 git 仓库中进行管理,这个仓库位于 GitHub 上。

CocoaPods 的依赖解决方案来源于 Molinillo, Molinillo 同样被用于其他大型的项目,比如 Bundler、RubyGems、Berkshelf。

CocoaPods 使用总览

  • 第一步: 创建 Xcode 工程
  • 第二部: 在 Xcode 工程的目录下执行: pod init
  • 第三步: 如果遇到 command not found: pod 证明没有安装,执行 sudo gem install cocoapods ,输入密码即可,然后重复第二步
  • 第四步:关闭 Xcode 工程,通过 workspace 工程打开,即可,
  • 在 Podfile 中写入依赖库,执行 pod install / update 即可自动集成第三方库
  • 在项目相应的文件中引入库文件即可

开始

  • 创建 Podfile

CocoaPods 提供了 pod init 这条快速创建 Podfile 的命令

1
2
3
4
5
6
7
8
platform :ios, '8.0'
use_frameworks!

target 'MyApp' do
pod 'AFNetworking', '~> 2.6'
pod 'ORStackView', '~> 3.0'
pod 'SwiftyJSON', '~> 2.3'
end
  • 安装
1
2
$ pod install
$ open App.xcworkspace
  • 使用
1
#import <Reachability/Reachability.h>

后续

CocoaPods 是一款包管理工具,可以通过它管理私有库,或者分发私有库。
当然,CocoaPds

参考

  1. CocoaPods wikipedia
  2. CocoaPods 官网
1…111213
Alice

Alice

The Loneliest Whale in the World

121 日志
35 分类
30 标签
© 2021 Alice
由 Hexo 强力驱动
主题 - NexT.Pisces